How-to guide
How to make a pixel art character from a photo
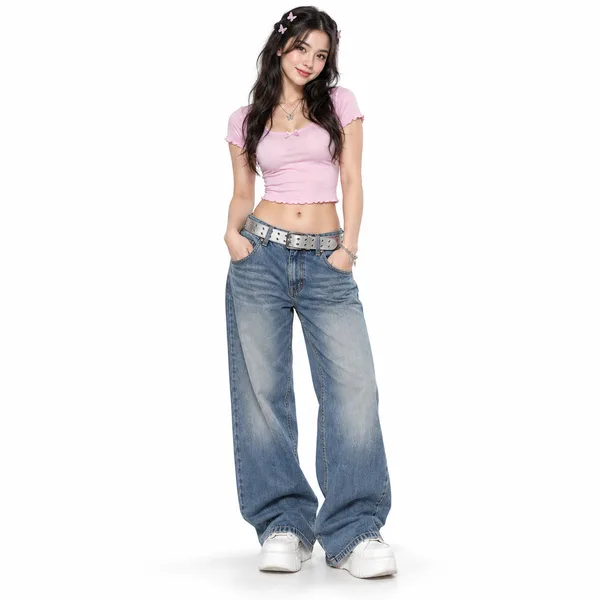
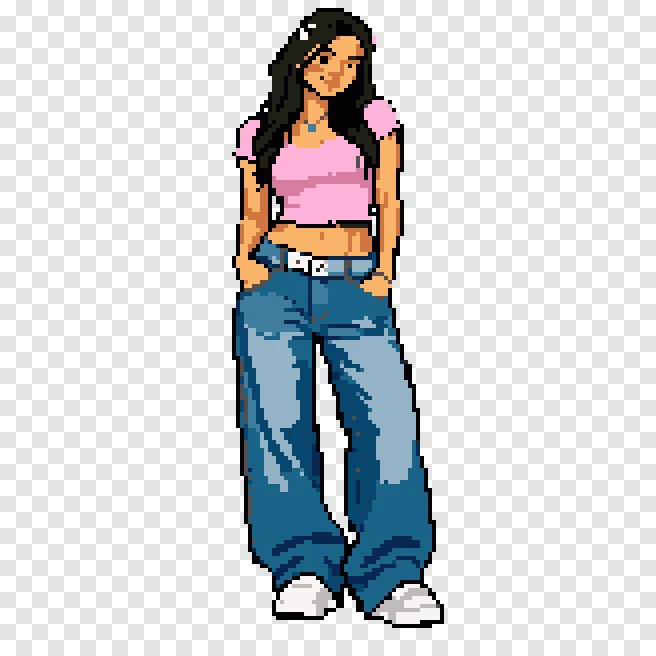
The right image is the app's Aseprite export, enlarged 4x. The checkerboard is its transparent background.
 Make my sprite in the app
Free to start · iPhone / Android
Free plan: the PNG gets a small PIXELME mark. Pro saves without it.
- Transparent background
- 164x164, 14 colors
- .aseprite or PNG, 1x to 4x
Pick a photo in the PixelMe app, remove the background, fix stray pixels, then export a transparent PNG or an .aseprite file. Use it as a game sprite or an avatar. One still sprite per photo, not an animation.
What you get
- Aseprite file
- 164x164 canvas, one layer, indexed color: 14 colors plus transparent. The character itself is 53x155 pixels.
- PNG (1x)
- 164x164 with a transparent background. On the free plan, a small PIXELME mark is added at the bottom right.
Check it on your own photo
Free to start · iPhone / Android
Three steps to the sprite
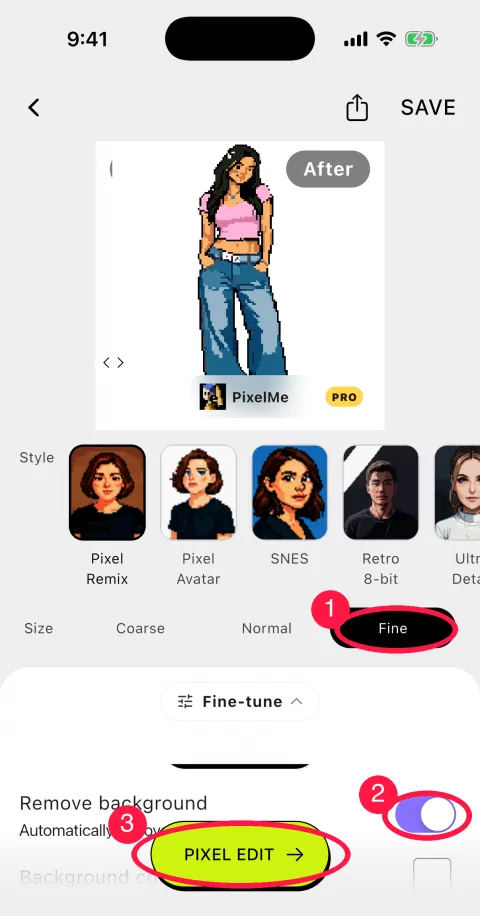
The red circles show where to tap.
1Convert at Fine with the background removed
On the home screen, tap Create Pixel Art and pick the photo. Set Size to Fine (1) and turn on Remove background (2). Then tap PIXEL EDIT (3).
2Touch up the pixels
The editor shows every pixel on a grid, with the transparent background as a checkerboard. Fix stray pixels with the pen, eraser or fill tool. The editor counts 15 colors here: 14 colors plus transparent. When you are done, tap the save button at the top right.
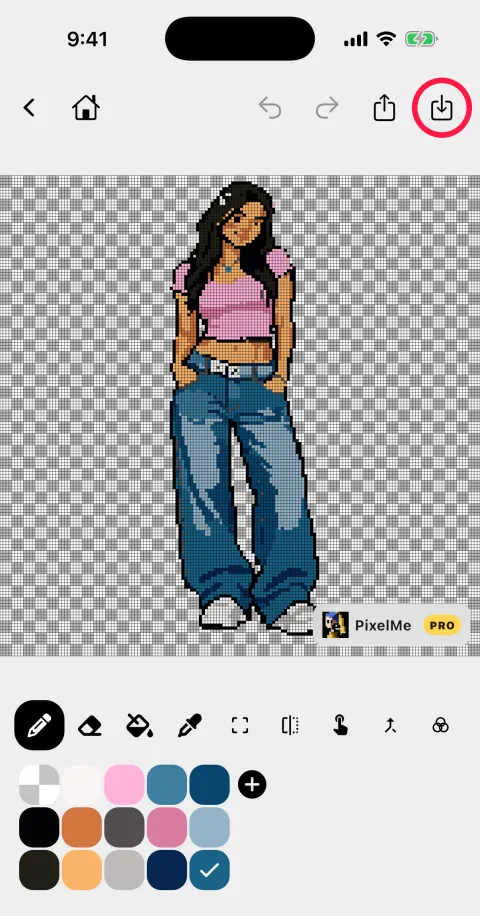
3Export an Aseprite file or a PNG
For Aseprite: Save → Print / open in pattern apps → Aseprite, then choose where to save the .aseprite file.
For a PNG: Save → Save to Camera Roll. Under Export size, 1x keeps the real size (164x164 here); the other choices (2x to 4x, 512 or 1024 wide or high) enlarge it.
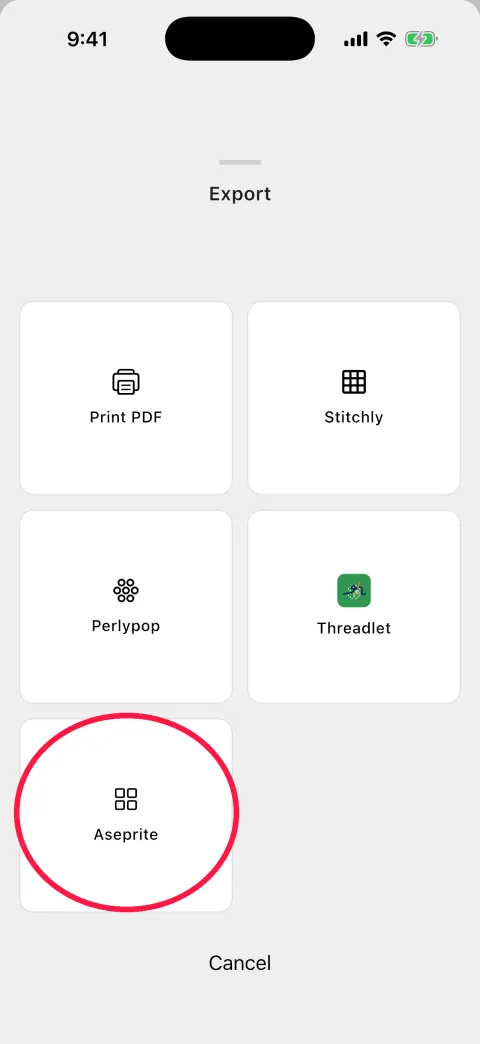
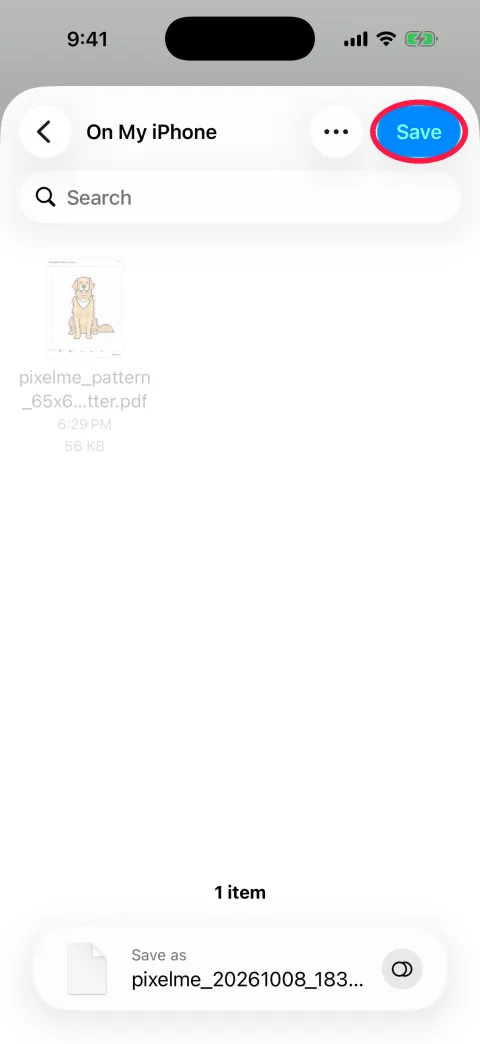
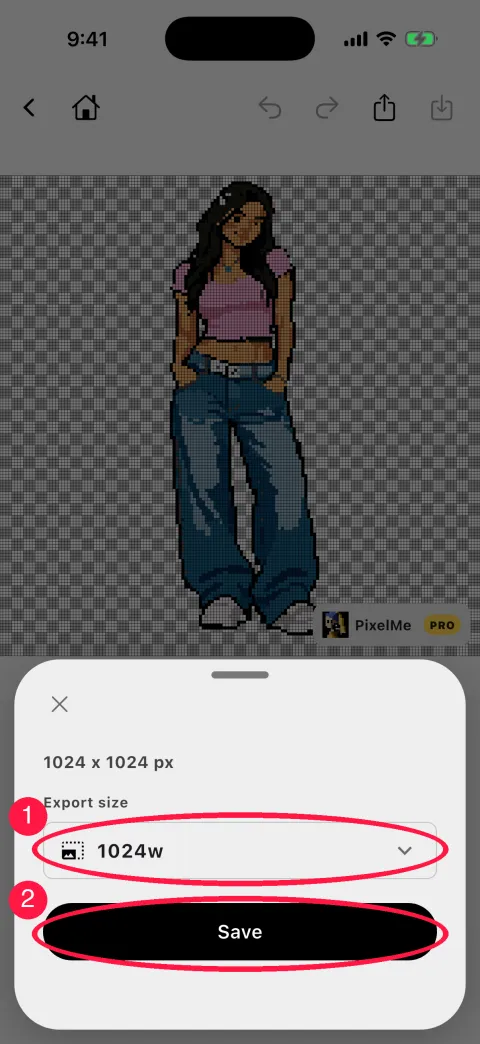
Try these steps in the app
Free to start · iPhone / Android
Tips
- The photo
- Use a photo that shows the whole figure. The example is a full-body photo on a plain white background.
- Size
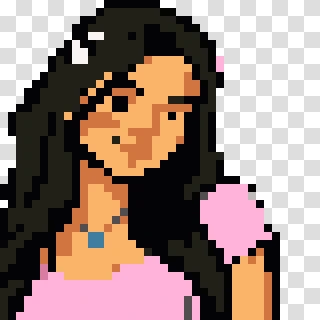
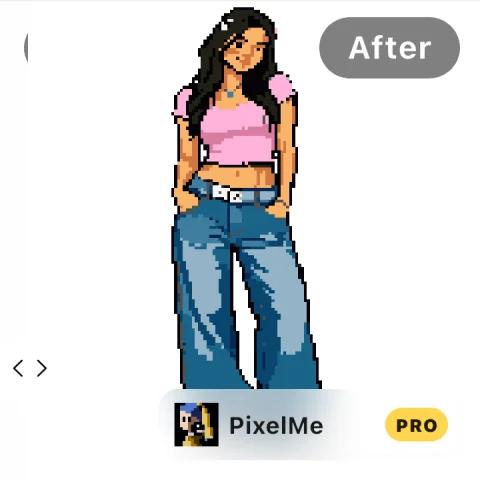
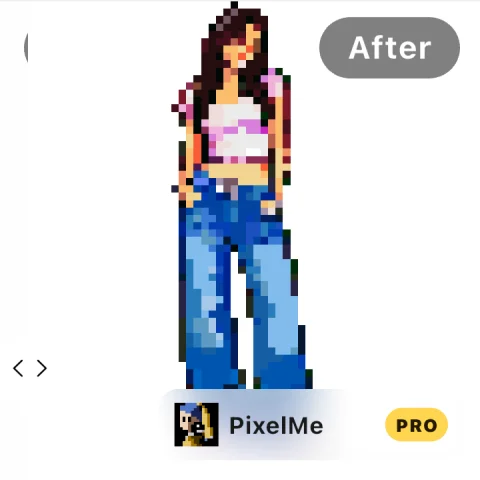
- Fine kept the face and clothes readable for this full-body photo. Coarse made fewer, bigger pixels and lost most of the face (below: the app's results, cropped).
- Style
- Try a few styles from the Style row before you start editing.
Make your character in the app
★★★★★
Works wonderfully. Super fun and fast to make cool pixel art out of your images.
mt4946 (App Store review)
Free to start · iPhone / Android
The free plan shows ads and offers Pro.